
Congrats! You’ve reached out to your local cabinet painters, gotten an estimate, confirmed your paint colors, and now you’re counting down until your outdated cabinets are painted a fresh new color. The painters are scheduled to arrive in a few days, and you’re eager to get everything ready. So where do you begin? Here are some tips for packing up your kitchen before cabinet painting, to make the process quick and easy!

First, find out just how much you’ll need to empty everything out of your cabinets. It might be less than you think!
Your painting company probably chatted with you about this during your initial consultation. The biggest factor in knowing how to pack up your kitchen is determining whether you’ll have to remove nearly everything that (unfortunately) you’ve probably been packing away for years.
Do you want the insides of your cabinets painted? The insides of most newer cabinets are often made with a natural clear finish which is attractive and extremely durable. It’s perfectly acceptable to leave those insides as-is. In that case, you won’t have to clear out your cabinets at all!

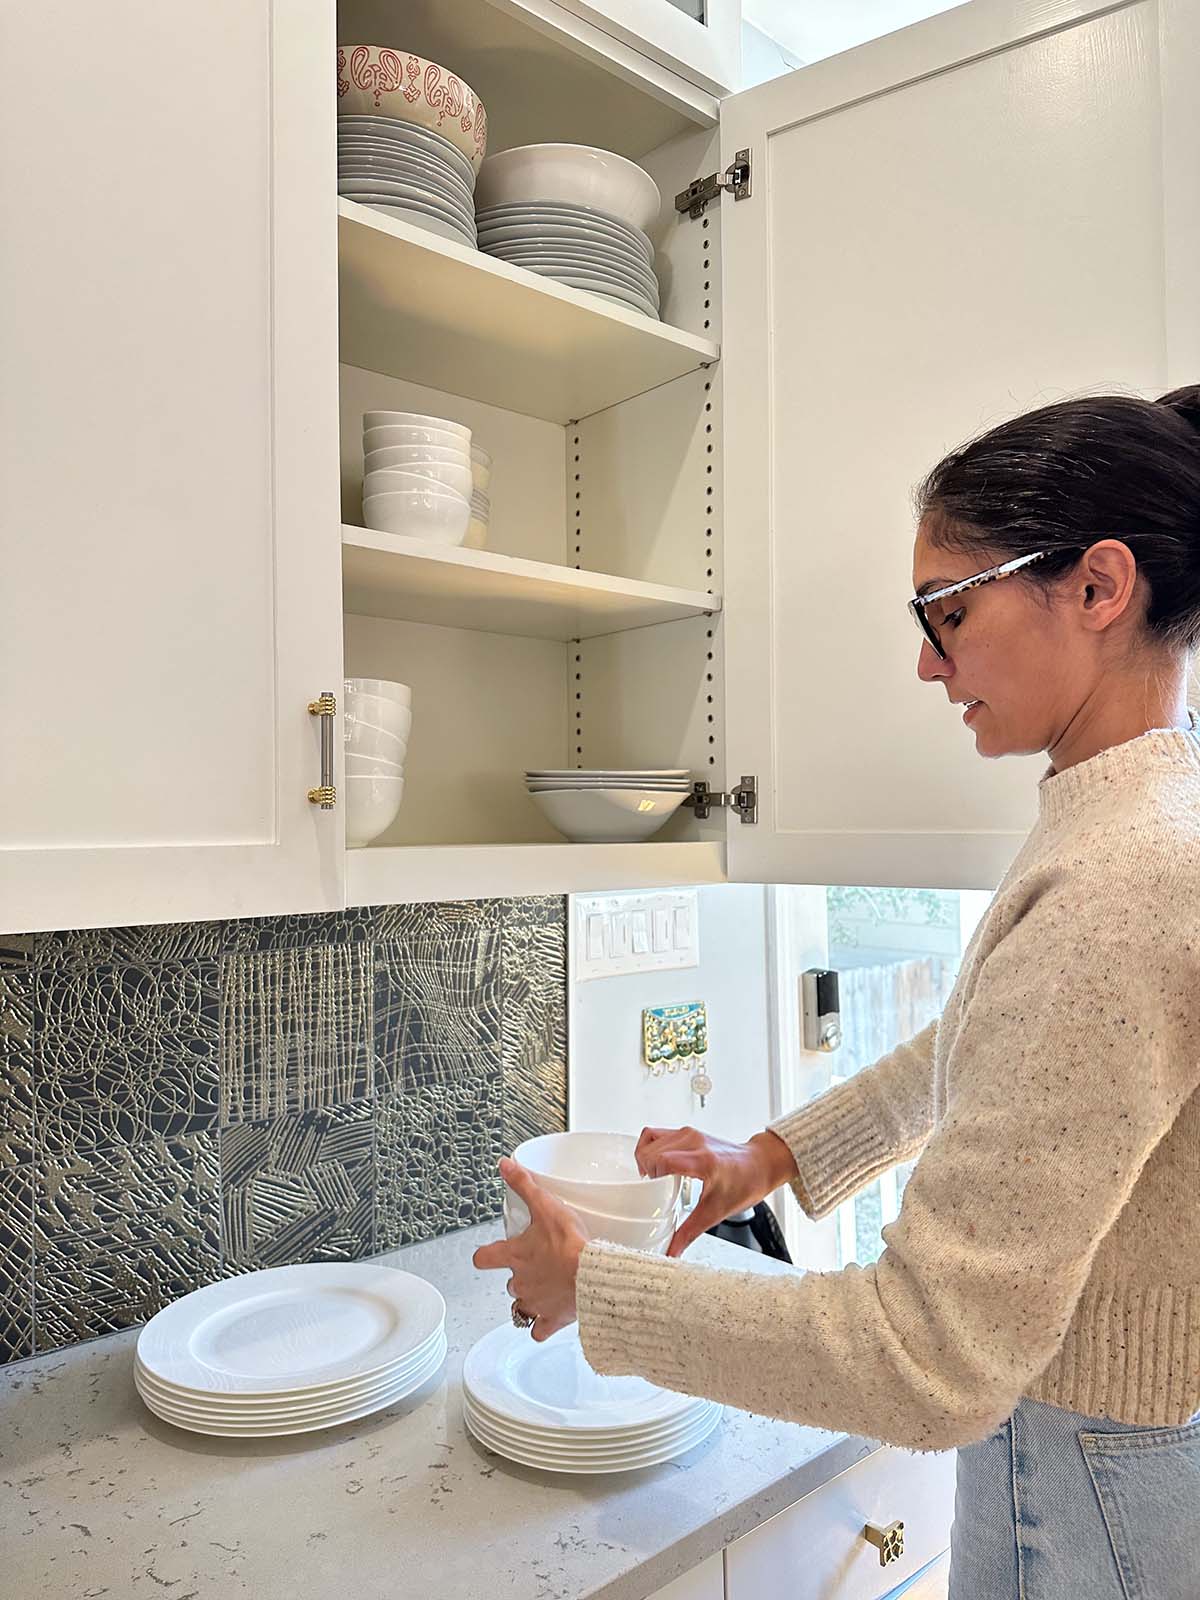
Your dishes, mugs, and glassware can all stay in place. Your cabinet painters will mask off the insides of your cabinets, with all your belongings safely sealed behind the masking plastic, before they start priming and painting.

Then they’ll proceed to paint the outsides of your cabinets, your cabinet bases, and the fronts and backs of your cabinet doors.
Homeowners are usually thrilled to discover that if the insides of their cabinets aren’t going to be painted, they won’t have to clear out everything after all!
The exception to this is if you have glass-fronted cabinets, which mean the insides of those particular sections are visible even with the doors closed. In that case, you might want those inside sections painted after all, which means those sections do need to be cleared out.

What about your kitchen drawers?
Older cabinets were often constructed with the drawers glued and fitted together into one complete assembly. Newer cabinets usually have a removable front panel, which theoretically can be unscrewed apart from the rest of the drawer itself.

Unfortunately, those “removable” panels are often glued on, as well as screwed in place.
This means that your drawers will need to be emptied out, whether you’re getting the insides painted or not.
The silver lining? This gives you a chance to purge all those items in your junk drawer!
Homeowners are usually thrilled to discover that if the insides of their cabinets aren’t going to be painted, they won’t have to clear out everything after all!
Next, evaluate what you’ll need to access while your cabinets are being painted.
Just because you don’t have to empty your cabinets completely doesn’t mean you won’t need to move some daily necessities out of the kitchen.

Items that your painters have sealed off behind plastic won’t be easily accessible. Happily, your cabinet painting project will probably take less than a week. Although the time will go by quickly, you may still have to use certain things like your silverware, favorite boxes of cereal, or kids’ sippy cups. You’ll want to clear those items out of your kitchen before your painters arrive.
This applies to countertop gadgets as well. Your counters need to be completely cleared off, no matter what. Decorative items can just go into boxes, but you’ll probably want to take your coffee maker, toaster, or Vitamix out to an adjoining space, like your dining room table, that’s easily accessible. (Lay down a felt-backed plastic tablecloth first.) That way you can stay out of the kitchen while your painters are working. Most likely, they’ll be tenting off the area with zip walls to contain any dust, and you won’t want to duck into the work zone just to make a cup of coffee.
Ideally, you can carry a few necessities to a dining room, hallway, or laundry room, for easy access during your project. Don’t forget to pull the cutlery tray out of your silverware drawer and take it with you!
What if you will be getting the cabinet insides painted, after all?

Tips for packing up your kitchen when it needs to be completely cleared out
If you are going to have the insides done, then here’s how to get ready for cabinet painting. To start, plan on a few days or a weekend to get the area ready.
Kitchens can contain way more “stuff” than you might imagine. Gear up with some sturdy boxes to pack your dishes and pots and pans into. Foodstuffs can go into boxes or bags.

Now is the time to get rid of extra items that have outlived their usefulness. You may not have decluttered your kitchen in a while. This is a golden opportunity to pare down the contents to what you truly want and need. Cast a beady eye over some of these worst offenders, and be ready to toss them in the trash, donations, or recycling bin:
- Canned or dry goods that you’re keeping “just in case”. A few emergency supplies are fine, but if you’re saving all those packets of onion soup because they might come in handy at the next Thanksgiving, you might feel better just letting them go. And canned goods are heavy and unwieldy. Donate them!
- Plastic storage containers. These always seem to multiply, or (even worse) get separated from their lids. You’ve probably used them one too many times in the microwave anyway (never a good idea, health-wise). Replace them with a few pieces that you’ll actually use.
- Rarely-used kitchen gadgets. Unless you’re an accomplished chef, odds are you’ve got a few impulse buys in your kitchen that you haven’t touched in months. Whether it’s an air fryer or the doodad that can julienne your vegetables, apply the same criteria that professional organizers advise for the clothes in your closet. If you haven’t used or worn it in six months to a year, donate it.
This Houzz article goes into more detail, explaining how to pack up your kitchen for a longer project, like a full remodel. If you’re getting more extensive work done than just painting, taking a thoughtful approach in advance will save you and your family aggravation later.
Ideally, once your cabinets are fresh and beautiful with their new finish, the experience of loading your items back in afterwards will be a happy conclusion to a great project, not a painful chore of shoving clutter back in.

What about the food in your fridge? Do you have to empty that out as well?
When homeowners ask us how to get ready for cabinet painting, this is usually top of mind. The good news is, you can keep the food in your refrigerator, although if you happen to have a secondary fridge in your garage, you might consider taking advantage of it and moving your milk or produce out there.
However, during the days that your painters will be working on your cabinets, it’s best not to count on using your kitchen at all. You can grab milk from the fridge to make yourself a bowl of cereal, but cooking is going to be off-limits. We explain why in this post, but basically, your stove, wall ovens, and microwave will be sealed off with plastic. For the few days or a week that your project lasts, it’s better to either eat out, or order in.

Don’t forget that your dishwasher will be sealed off as well, so you won’t be able to wash dishes in your kitchen. You can hand-wash them elsewhere, but many homeowners find it easier to use disposable plates.
Cleaning your kitchen
This is the final step. With your counters cleared off and any necessities moved out of the area, give your kitchen a once-over with a good cleaner or degreaser, especially around the stove. This helps ensure that your new painted finish will last a long time!

Don’t worry about doing anything else, though. You don’t have to remove your cabinet hardware, for example. Your cabinet painters will have their own system for removing hardware in such a way that everything can be easily reassembled afterwards.
Then just sit back and before long, you’ll be able to enjoy your beautifully-transformed kitchen.

Here’s our summary list of how to get ready for cabinet painting.
Tips for packing up your kitchen before the cabinet painters arrive:
- Consult with your painters on how much you’ll need to empty out your cabinets.
- If you don’t have to clear everything out, determine which items you’ll want to keep handy, and move them to an adjoining area.
- If you do need to empty your cabinets completely, set aside a few days and have some sturdy boxes on hand.
- This is a golden opportunity to declutter. As you take everything out of your cabinets, be ruthless in deciding what you really need to keep afterwards.
- Buy any paper or plastic dishes you’ll need, so that you don’t have to wash dishes in the bathroom sink.
- Plan ahead knowing that your kitchen appliances will be off-limits for a few days. Prepare to eat out, or order in.
- Give the cabinets around your stove a good cleaning, and wipe down the rest of your kitchen to have it ready for your cabinet painters.
If this sounds like a lot of work, don’t be dismayed. You’ll have a gorgeous, updated kitchen at the end of the process, that you can enjoy for years to come. And if you have any questions about how to get ready for cabinet painting in your particular home, remember your painting company will be happy to help.